The business case in the example is quite simple: we want to create a page to allow us to create and edit employee information. There are two types of employees: salaried employees and hourly employees. Salaried employees earn a yearly salary regardless of how many long hours they work (sounds familiar), whereas hourly employees earn an hourly rate for each hour they work. Our database table looks like this:
create table my_emp
(empno number not null primary key,
emptype varchar2(1) not null,
salary number,
hourlyrate number);
On our employee edit screen, we want to show the salary field if the employee type is "S" (for salaried) and show the hourlyrate field if the employee type is "H". In both cases, the field that does not apply to the particular employee should be hidden AND should be automatically set to null in the database. We'll also create a typical list screen that lets us browse through the employees and select one to edit, and also to create new employees.
I will walk quickly through the preliminary steps, and slow down later on to show the details. This example should work with any of the point releases of JDeveloper 10g R3 (10.1.3.x).
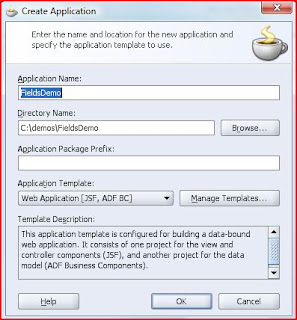
To get started, use your favorite tool (SQL*Plus, SQL Developer, JDeveloper, etc) to create the table as shown above. Then, in JDeveloper, create a database connection to the database/account that owns the table you created. Finally, create a new application, selecting the "Web Application [JSF, ADF BC]" template in the directory of your choice:
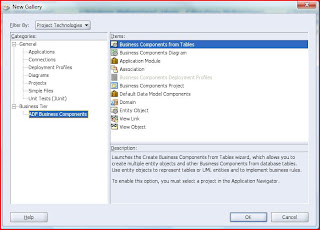
In your newly created application, you should have two projects - "Model" and "ViewController." The next step is to create some ADF Business Components for the my_emp table. In this example, we'll just create some basic stuff (a single Entity Object, a default editable View Object, and a default Application Module). To do this, right-click the Model project and choose "New..." In the dialog that appears, choose "ADF Business Components" in the categories pane and "Business Components from Tables" in the items pane:
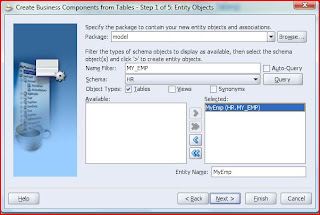
You'll be prompted to initialize your project for business components. Pick the connection you created earlier (and the SQL flavor and type map if you are not using an Oracle database) and click "OK." Now, you'll quickly walk through the wizard to create the default business components. Click "Next" to dismiss the welcome screen, if it is shown. On the next screen, type "my_emp" in the name filter and press "Query" to display the table you created earlier; use the shuttle controls to add the MY_EMP table to the selected list:
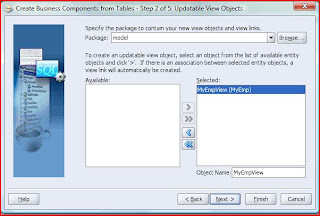
Click "Next" to display the "Updatable View Objects" page of the wizard; use the shuttle controls to add the MyEmp Entity Object to the selected list:
From here on out, we will just be taking the defaults for the wizard, so you can click "Finish." If you'd like to see the steps one-by-one, you can click "Next" on each page to see them. Once you are done, you will have a single Entity Object called "MyEmp," an updatable View Object called "MyEmpView," and an Application Module called "AppModule," which has MyEmpView in its data model. You can see these objects by expanding the folders under the Model project in the Applications Navigator. To make things a bit easier down the road, let's set a default for the employee type to "H" for hourly. To do this, double-click on the MyEmp entity object. In the dialog that appears, expand the Attributes tree on the left side and click the "EmpType" attribute. Now, in the right pane, enter "H" into the default value field and press "OK" when done:
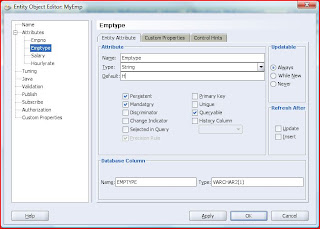
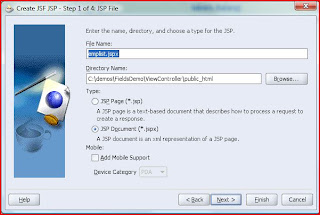
That's it for the data model; in real life, you'd of course give some nice attribute names, display hints, etc, etc, but I'll leave that to you. The next step for this exercise is to create the JSF pages. We will first create a simple list-type page that lists the employees and allows us to select an employee to edit or to create a new employee. To do this, right-click the "ViewController" project and select "New..." In the dialog that appears, select "JSF" from the categories pane and JSF JSP from the items pane. Click "Next" to dismiss the welcome page, if it is shown; this will display the "JSP File" step of the wizard. Let's call our page "emplist.jspx" Make sure the "JSP Document" radio button is selected for the document type:
Click "Next" to display the component binding page. As we do not need component bindings, click "Next" to display the tag libraries page. Ensure that you have the 4 libraries selected as shown here:
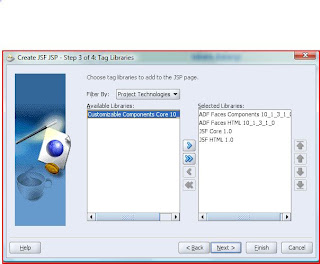
Now, you can click "Finish" to complete the wizard. While we are at it, follow the same steps to create an "empedit.jspx" page. Now, let's finish the emplist page - it's the simpler of the two. To create an ADF Faces table, go to the Data Control Palette window in JDeveloper. You should see a single data control called "AppModuleDataControl." Expand the data control, and you'll find your single view object, "MyEmpView1." Ensure that you have the emplist.jspx page open in the visual editor and drag the "MyEmpView1" view object on to the emplist.jspx page. In the pop-up menu that appears, select the "Tables" menu and then the "ADF Read-only" table from the sub-menu. Ensure that you click the "Enable Selection" checkbox and click "OK." You'll now see the af:table added to your page. If you run the page now, you'll see an empty table because there are no rows in the database.
Next, let's add "Edit" and "New Employee" buttons to the page. First, get rid of the "Submit" button that JDeveloper created for you automatically by selecting it and hitting the Delete key. The "Edit" button that we are going to add must be inside of the af:tableSelectOne object that exists inside of the "selection" facet of the table. My preferred way to drag-and-drop components is to use the structure window in JDeveloper, because it gives me the most precision. So, expand the items in the structure window until you get to the af:tableSelectOne object (you can also click on the radio buttons in the "Select" column of the table to do this automatically):
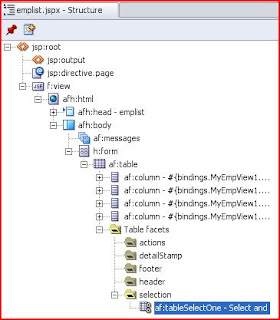
Now, find the Control Palette window in JDeveloper. Select "ADF Faces Core" from the drop-down at the top of the palette and find the "CommandButton" component. Drag this component and drop it into the af:tableSelectOne on your page. If you've done it correctly, you'll se an af:commandButton inside of the af:tableSelectOne in the structure window, and your page will look like this:
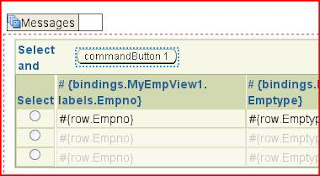
Use the Property Inspector window of JDeveloper to change the text of the button to "Edit." Now, let's add the "New Employee" button. Because the "New Employee" button does not require an employee to be selected first, it doesn't belong in the selection facet of the table, but the "actions" facet. First, make sure that you can see the actions facet in JDeveloper's structure window; secondly, in the Data Control Palette, expand the AppModuleDataControl, the EmpView1, and the Operations folder. Find the "Create" operation and drag it into the actions facet, using the structure window. In the pop-up window that appears when you release the mouse, select ADF Command Button. You can now use the property inspector to change the text of the command button to "New Employee."
Now, without going into a long explanation of why (read the docs if you must), we need to change the binding on the "New Employee" button from the "Create" action to "CreateInsert." To do this, right-click in a blank area of the emplist.jspx page and choose "Go To Page Definition." Using the structure window, expand the bindings folder and double-click on the "Create" binding. In the window that appears, change the action from "Create" to "CreateInsert:"
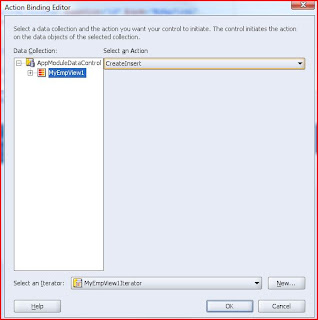
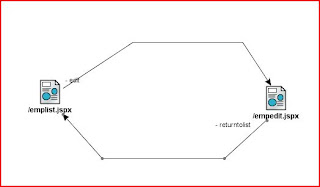
Now, save and close the page binding. The final piece of work we need to do on this page is to set up some navigation cases so that we can navigate back and forth between the list and edit pages. I'm not going to walk through all of the steps here (a quick read of the docs should set you in the right direction). Create two navigation cases, one going from emplist.jspx to empedit.jspx called "edit" and one going from empedit.jspx to emplist.jspx called "returntolist." Here's what my faces-config.xml navigation diagram looked like after this step:
Wow - this is more steps than I thought.... continued in part deux.
3 comments:
I was working the other day on OTN JDeveloper and I know it sounds like something pretty basic, I forgot how to hide/show fields on an ADF Faces page, I know now thanks!
Actually have a very nice blog, I wish I could see everything you have all the time, I'm really entertained by your comments, and best wishes for your blog
The post is very nicely written and it contains many useful facts. I am happy to find your distinguished way of writing the post. Now you make it easy for me to understand and implement. Thanks for sharing with us. Norma
Post a Comment